Adobe Lightroom Classic version 16 and Lightroom Desktop version 10 include a new feature called Glow. Glow is not something that you are going to use on every image. It works best when a photo already contains clear light sources, such as streetlamps, neon signs, or a sun that is sitting just below the horizon.
On the right scene, a little Glow can add a mood that is difficult to create with any other method in Lightroom. In this tutorial, I explain every Glow control and then walk through four examples that combine Glow with Lightroom’s Masking tools.
Click here to download the examples in this video and play along! (Subscribers Only)
Where To Find Glow In Lightroom
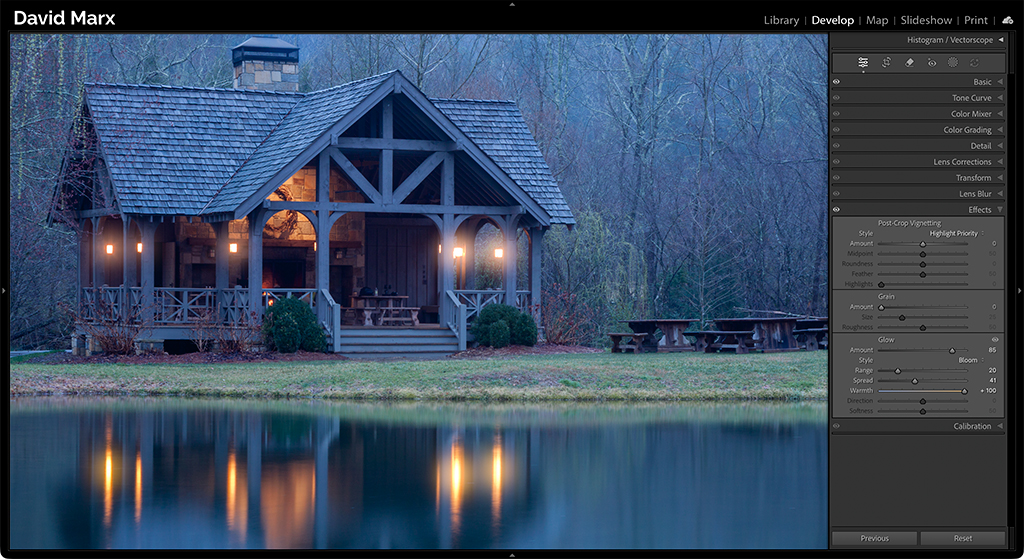
In Lightroom Classic, Glow sits at the bottom of the Develop Module’s Effects Panel, below Post-Crop Vignetting and Grain. Glow also lives inside the Masking Panel, which means that it can be applied to the whole image or targeted to specific areas with a mask. Although its interface looks different, Glow also appears in the Effects Panel and the Masking Panel in Lightroom Desktop.
The Five Glow Styles
There are five Styles of Glow to choose from:
- Bloom creates a soft, even glow that radiates out from the highlights.
- Halation recreates a look from the film era, when highlights on some color films would shine with a yellow or red color cast.
- Diffusion creates a soft, hazy, dreamlike effect that spreads across the frame.
- Motion creates beams of light that extend out from each light source. Each light source anchors one end of its beam.
- Streak also creates beams of light, but each light source sits in the middle of its beam.
Bloom and Halation are similar, and they are the two Styles that I find the most useful.
Suggested Glow Workflow
When using Glow, I like to pick the Style first and then raise the Amount slider. Setting the Amount to 100 makes it easy to see what each Style does and where the Glow alters the image. Once the Style is set, the remaining sliders control where the Glow appears, how far it spreads, and what color it takes on.
Range works like a luminosity selection. Dragging Range to the left limits the Glow to the brightest highlights, and dragging it to the right expands the effect into more of the midtones and shadows.
Spread controls how far the Glow radiates out from the targeted areas. Lower values keep the Glow close to the highlights, and higher values push it further away from them.
Warmth changes the color of the Glow. Dragging Warmth to the left adds a cooler, blue color cast, and dragging it to the right adds a warmer yellow or orange one. When the Style is set to Halation, Warmth cannot create a blue color cast. Its choices run from yellow to red instead.
Direction and Softness are disabled unless the Motion or Streak Style is selected. Direction rotates the beams of light that Lightroom creates, and Softness controls the width and softness of their edges.
Tip: To see exactly what Range or Spread is targeting, hold down the Option key on a Mac or the Alt key on a PC while dragging the slider. As with many tools in Lightroom, this displays a grayscale overlay. In the overlay, white represents the areas where the Glow will be visible, and black represents the areas where it will have no effect.
The same trick works with Warmth, where it shows the color cast against a black-and-white version of your image. Inside a mask, this trick temporarily disables the mask, so the overlay shows what the setting would do across the entire image.
For a before-and-after comparison, click and hold the eyeball icon beside the word Glow.
Only The Amount Slider Works Locally
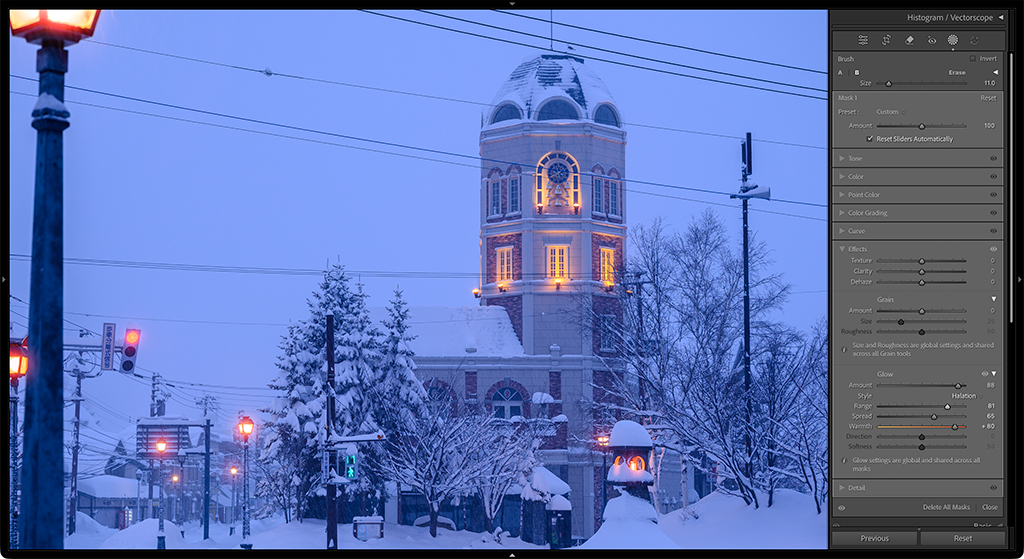
Although Glow works with all types of masks, only the Amount slider can be changed locally. Just like Grain, a mask can target the Glow to specific parts of an image, but the Style, Range, Spread, Warmth, Direction, and Softness settings are global.
Whether you adjust these settings in the Effects Panel or in the Masking Panel, their values will always match. This also means that only one Glow Style can be used on an image at a time.
In the Masking Panel, the Amount slider runs from -100 to +100. A negative value reduces or removes the global Glow inside the masked area, which is useful when you want to soften or block the effect in one part of the image. Setting the Glow Amount to a negative number in the Masking Panel has no effect when the global Glow Amount is set to zero.
Using Two Glow Styles On The Same Photo
Most of the time, one Glow Style per image is all that you will need. In those rare cases where you want to use more than one type of Glow on the same picture, there are two options. The first is to move over to Adobe Photoshop and work with Layers and Masks.
The second stays entirely within Lightroom and uses the new Render To DNG command. You will not need this level of light alteration on most images, but it is good to know that it can now be done without leaving Lightroom.
Keep It Soft And Keep It Subtle
Glow will not suit every photo, and it is easy to overdo. Used with restraint on images that already contain clear light sources, it can add a dramatic, cinematic mood.
Choose the Style first, use the Alt or Option key to see what Range and Spread are targeting, and remember that a mask can change only the Amount. Setting the Amount to 100 is a useful way to learn what each Style does, but bring it back down before you export.
The best Glow is usually the one that viewers feel in the mood of the photo rather than notice as a post-processing effect.