![]() Adobe recently added a set of Film-Inspired Profiles and Presets across the Lightroom ecosystem. While these new tools are not intended to match the look of a specific film stock, they offer a creative starting point for any photographer who wishes to add an analog feel into their digital work.
Adobe recently added a set of Film-Inspired Profiles and Presets across the Lightroom ecosystem. While these new tools are not intended to match the look of a specific film stock, they offer a creative starting point for any photographer who wishes to add an analog feel into their digital work.
Click here to download the examples in this video and play along! (Subscribers Only)
In this video tutorial, we will help you master these new features and explain how Presets and Profiles differ in Lightroom’s Develop Module.
![]()
Setting the Baseline with Film-Inspired Profiles
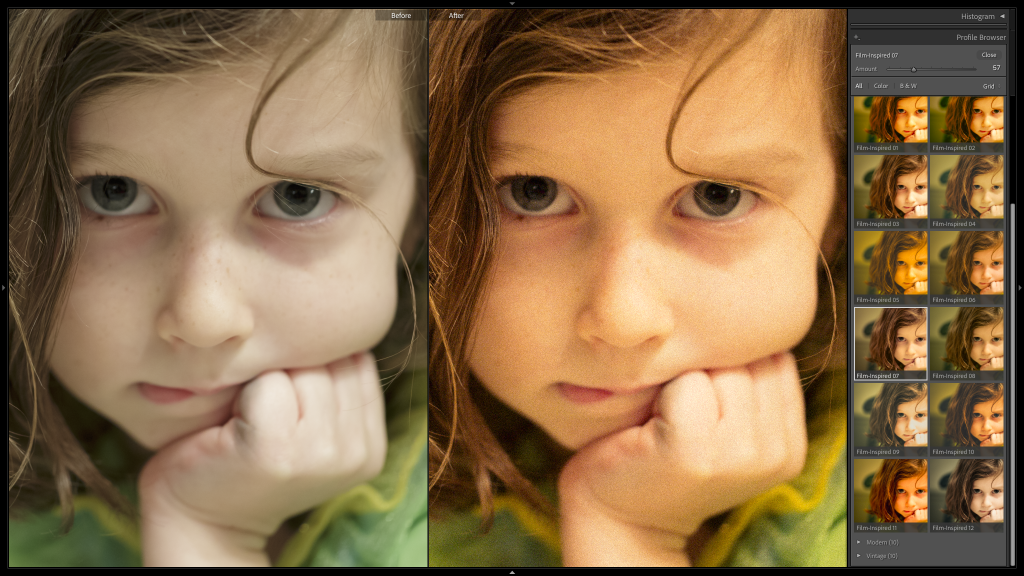
To locate these new Film-Inspired Profiles, navigate to the top of the Basic Panel in the Develop Module and click on the icon consisting of four small rectangles. This opens the Profile Browser.
Next, scroll down to the Creative Profiles section where you will find Film-Inspired Profiles that work on any type of digital image including raw and jpeg. These Profiles introduce sophisticated color shifts and saturation changes that mimic the characteristics of old film.
Mastering the Strength
Once you pick a Profile, use the Amount slider at the top of the Profile Browser to increase or decrease the intensity of the color changes that this change introduces into your image.
Pro Tip: Profiles establish your image’s baseline appearance without moving any of the Develop sliders. Selecting a Profile provides a starting point while leaving all of the other image adjustment controls in all of the panels—including Basic, Tone Curve, and Effects—at their default position.
Using Film-Inspired Presets for Instant Style
While Profiles set the foundation, the twelve new Film-Inspired Presets are complete “recipes.” Applying a Preset, like Soft Ember or Faded Blue, does more than just change your image’s colors. Unlike Profiles, Presets are like stored formulas that move the sliders to a specific position every time.
The best way to think of the difference between applying a Profile versus a Preset is efficiency. A Profile gives us a starting point but it makes no other changes. A Preset, on the other hand, can coordinate multiple adjustments to provide a polished look with a single click.
Workflow Secrets for Faster Editing
There are two secret keyboard shortcuts that are very helpful when you are working with Profiles and Presets.
The “Shift Key” Comparison Trick
The Live Preview feature in Lightroom Classic shows you how a Preset, or Profile, will alter your image as you hover over its name. This Live Preview feature is great, but it can also make it difficult to compare your current edits to an alternative look.
Secret: Hold down the SHIFT key while hovering over any item in the Presets or Profiles list. This action temporarily disables the Live Preview. By holding and releasing Shift, you can toggle between your current look and an alternative to determine which one is superior.
The “Alt/Option” Toggle for All Panels
Presets often apply a wide range of adjustments across various panels. If you wish to see your image without the influence of a specific panel’s settings:
- Hold down the ALT key (PC) or the ALT / OPTION key (Mac).
- Notice that the “Eyeball” icon on the left side of every panel header—including Basic, Tone Curve, Color Grading, Effects, and the Masking—transforms into a little Toggle Switch.
- Click on this toggle to temporarily disable the entire panel.
This is incredibly useful if a Preset has applied heavy vignetting in the Effects panel, for example, and you need to hide that change to judge the accuracy of your adjustments in other areas. When you are ready, simply click the toggle again to re-enable the changes that this makes.
Bonus Trick: Add A Border Using The Lightroom Mobile App
There is no way to add a border to outside of our images using only Lightroom Classic or Lightroom Desktop. There are plugins that can do this, and of course, we could easily accomplish this goal using Adobe Photoshop but there is a simple Lightroom alternative. If you send the image that you are working using the Adobe Lightroom Mobile App then you will find that the mobile App includes a simple border and resize for social media feature!
Artistic Expression Over Accuracy
Adobe designed these new Film-Inspired tools as artistic starting points. They offer an efficient way to make digital files feel more organic and more magnetic with minimal effort. For most photographers, these new Profiles and Presets provide the perfect balance of speed and filmesque style using nothing but Lightroom’s Develop tools.
If you find that these options are not enough, and if you need to match specific film stocks, then you might want to explore high-end plugins like Dehancer.