The Adobe Lightroom Classic installation process is not difficult, but unfortunately the program that you will downloaded from adobe.com provides minimal instruction. This lack of guidance often creates unnecessary confusion for brand new Lightroom Classic users. Unlike some other software programs, there are multiple steps involved in the Adobe Lightroom Classic installation process.
There are currently two different types of Adobe Lightroom on the market right now. If you are unsure what the difference between cloud-based vs. desktop-focused image storage means in this context then please click here to learn how Adobe Lightroom (cloud-based) and Adobe Lightroom Classic differ.
This video is intended for those who want to use the desktop-focused version of Adobe Lightroom Classic only. If you are looking for advice on how to install the other type of Lightroom, the cloud-based program whose name is Adobe Lightroom, then please watch this tutorial instead.
Likewise, please go to this tutorial if you are a currently an Adobe Lightroom user looking for advice on How To Upgrade To The Latest Version Of Adobe Lightroom Classic.
![]()
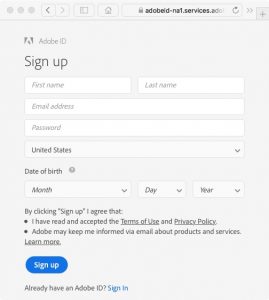
Step 1: Creating An Adobe ID
Before you can install Adobe Lightroom Classic you must create an Adobe ID at adobe.com. The username and password that you register here are important. Be sure that you write down your new username and password! You will need to enter these details in again before you can proceed with the installation process.
Step 2: Installing the Adobe Lightroom Classic Application
Now it is time to let the Adobe Lightroom Classic installer do its thing. At the end of the installation process, the Adobe Creative Cloud installer will automatically create a new Adobe Lightroom Catalog for you.
Your Lightroom Catalog is a database that indexes your photos. Your Lightroom Catalog allows you to organize thousands of digital images thanks to Lightroom’s robust search tools and other organizational features. At first, your Lightroom Catalog will be blank but that will change as soon you begin to add images into this index.
Step 3: Set Your Lightroom Preferences
The upgrade process is not complete until you set up your Adobe Lightroom Classic Preferences.
Preferences are not exciting stuff but you can avoid so many of the common Lightroom pitfalls if you take the time to change a couple of important settings before you do anything else with this software.
Step 4: Learn More
Congratulations! You are now ready to begin using Adobe Lightroom Classic. This would be a great time to become a FocusPhotoSchool.com subscriber to unlock our complete Adobe Lightroom Classic video training course.