![]() Before you start to work with Adobe Lightroom Classic you should go into your Preference Menus and change a few settings. To access the Preference Menus in Lightroom Classic go to Preferences from the Lightroom menu on a Mac or the Edit -> Preferences menu on a PC.
Before you start to work with Adobe Lightroom Classic you should go into your Preference Menus and change a few settings. To access the Preference Menus in Lightroom Classic go to Preferences from the Lightroom menu on a Mac or the Edit -> Preferences menu on a PC.
As you will see, there are a lot of options in here. Most of the switches in Lightroom Classic’s Preference Menus are a matter of personal preference. In the screenshots below I have left all of the settings that I consider insignificant alone.
Instead of worrying about each and every switch, I have focused on the options that can make a real difference either to the program’s performance or your long-term happiness with this software. I have tried to color-code all of the important options in the illustrations below using the following system:
Green Label = Changing these setting away from the factory default is suggested but not essential.
Yellow label = Changing these settings away from the factory default is recommended for better performance.
Red label = Changing these settings away from the factory default is strongly suggested.
My advice, if you are new to Lightroom Classic, is to set-up your preferences menus so they look like the screen shots below. As your familiarity with this program rises, I encourage you to revisit these menus and to adjust any of these options to better suit your workflow.
Note: All of these screenshots below were made using Lightroom Classic using a Mac computer. Your screen will be slightly different if you are using Lightroom on a Windows machine. The good news though is that all of the important preference switches are exactly the same on either a Mac or a PC.
The General Preferences Tab
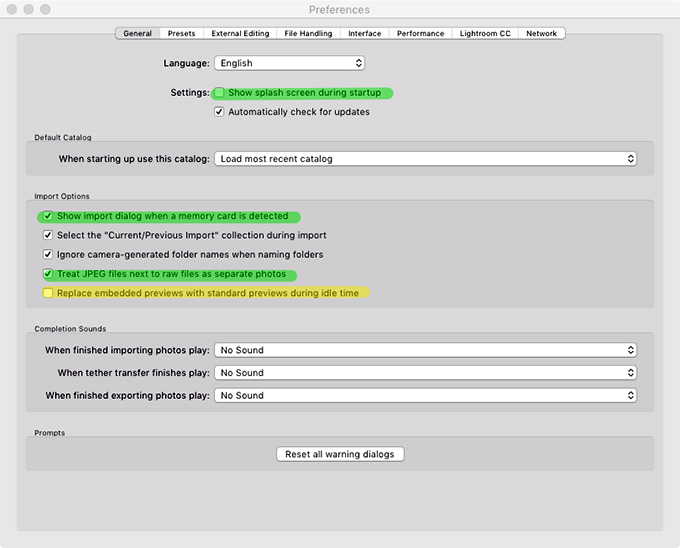
There aren’t any mission critical switches in the General Preferences Tab but if you are using the new Embedded and Sidecar Previews Workflow for faster initial raw image culling then the “Replace embedded previews with standard previews during idle time” option might interest you.
The Presets Tab
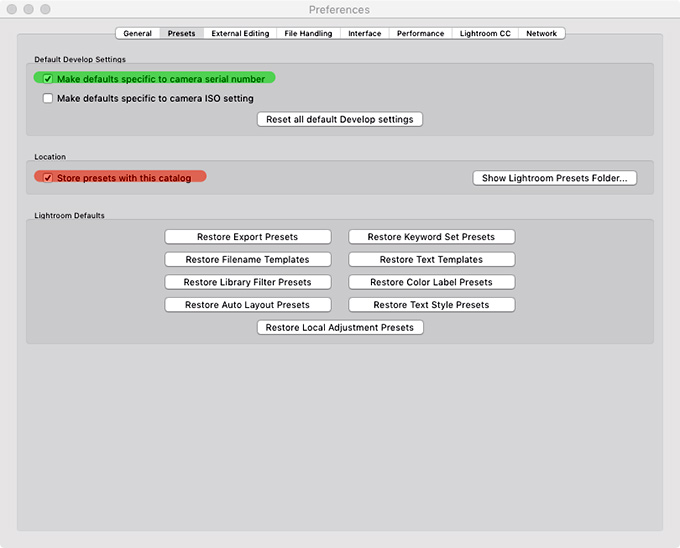
A separate tutorial on the confusing Store Presets with Catalog preference option is included in this Module. Also really advanced users who are interested in changing Lightroom’s default Develop settings on a per camera basis might want to change the “Make defaults specific to camera serial number” option.
The External Editing Tab
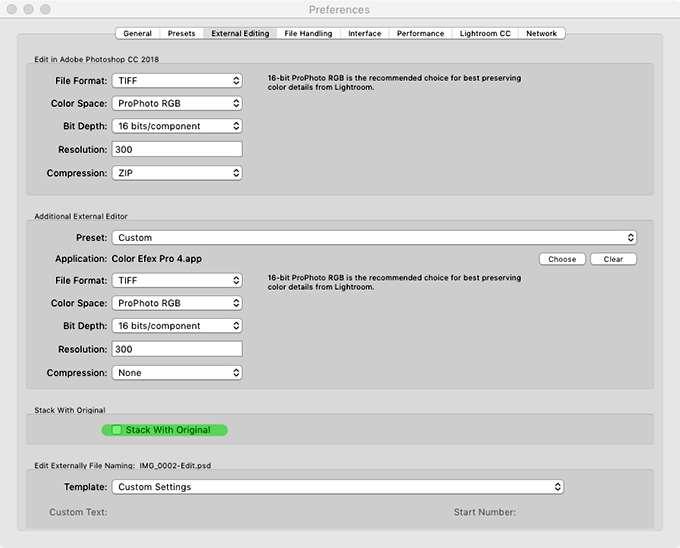
The settings in the External Editing Tab are only relevant when you send an image from Lightroom over to Adobe Photoshop or some other program for additional editing. This tab controls the default file format that Lightroom uses when handing over a copy of your file to Photoshop for additional refinement.
The File Handling Tab
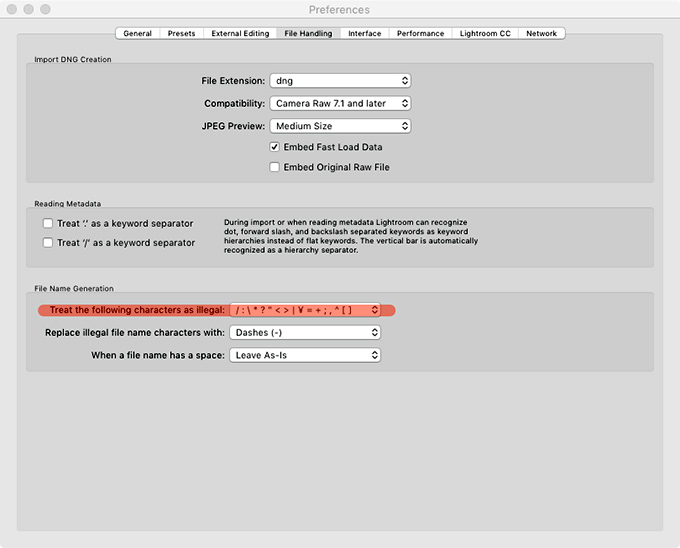
Make life easier for yourself. Be sure that you set the option in this tab for how Lightroom Classic should treat illegal characters in your filenames to the longest list of forbidden characters.
The Interface Tab
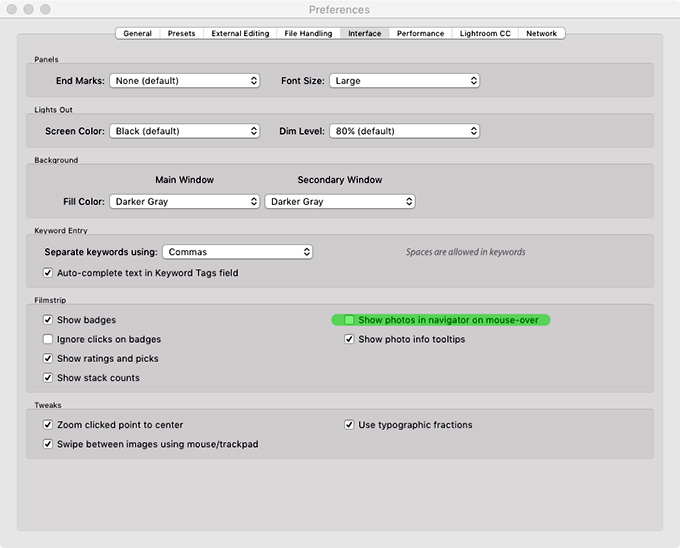
There is nothing too important in here although I find the factory default setting for the “Show photos in Navigator on mouse-over” irritating. It drives me nuts when things change on my screen just because I moved the mouse around, but did not click on anything.
The Performance Tab
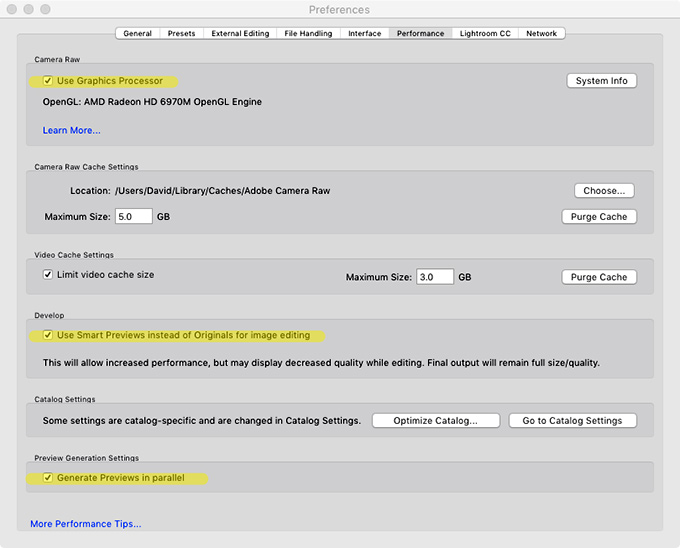
If possible, enable the “Use Graphics Processor” preference switch so that Lightroom Classic can capitalize on the power of your computer’s graphics card. The catch though is that not all graphics cards are compatible with Lightroom and enabling this switch can, in rare cases, cause the program to become unstable. If you encounter strange errors, or a lot of instability, then come back and disable this setting.
Cache, in this context, refers to the amount of our hard drive that this program will monopolize for its own computations when working on digital camera raw files. For best performance a Camera Raw Cache size of 5GB is now recommended.
The Sync Tab
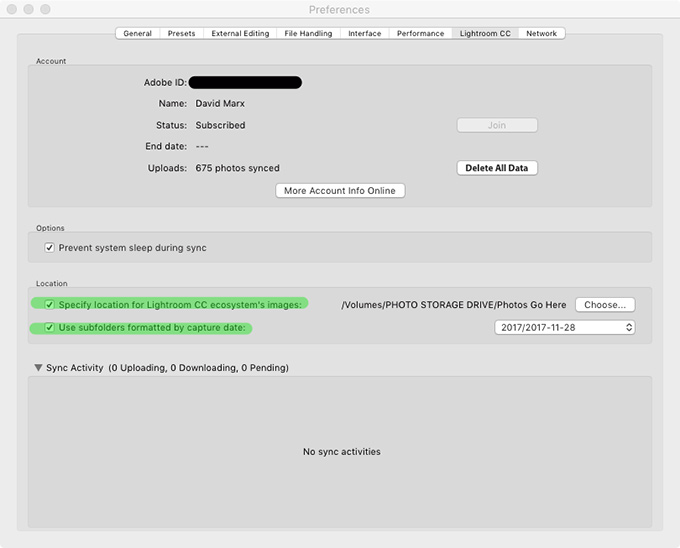
The options in this tab only apply to Lightroom Classic users who are also using the Lightroom Mobile App on their smartphones and tablets. You will find more details on this in our Module on Adobe Photoshop Lightroom for Mobile.
The Network Preferences Tab
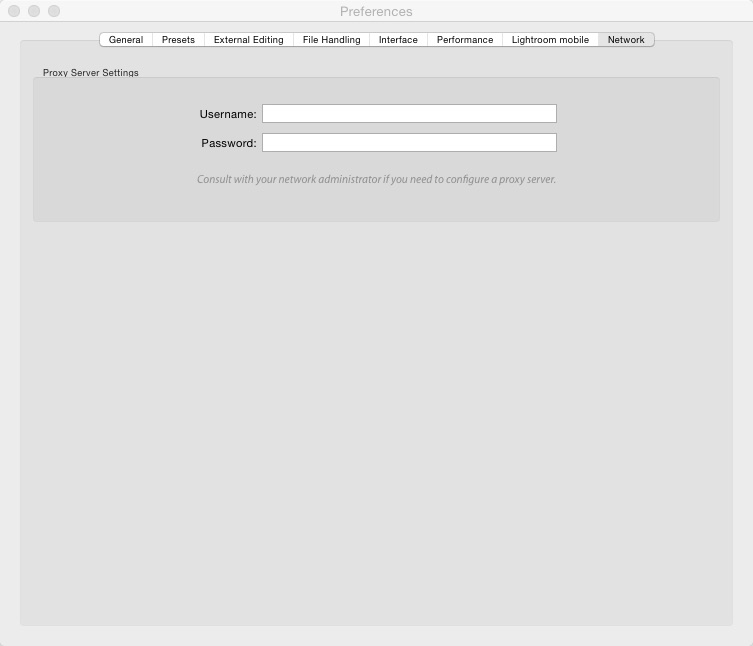
The settings in this tab only apply to users who are storing their images on network-attached external devices. This type of advanced file storage is not recommended for most Lightroom users and it is definitely not for beginners.
![]()
“But wait. There’s more!” There are some very important settings that live inside of Lightroom Classic’s Catalog Settings Menu. So please go to Lightroom – > Catalog Settings menu on a Mac or to the Edit – > Catalog Settings menu on a PC to complete your setup.
The General Catalog Settings Tab
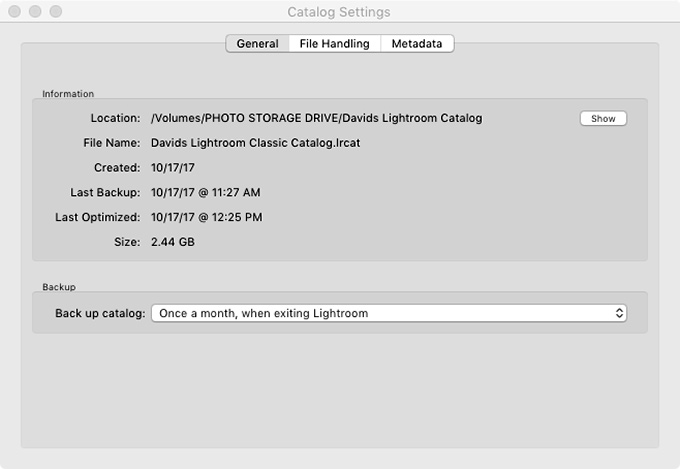
There isn’t anything in this tab that you must change. It is important to note the fine print in here though. When Lightroom asks you to make a “Catalog Backup” on a daily, weekly, or monthly basis you must understand that all that the program can do is to duplicate your .lrcat (catalog) file. None of your precious images will be protected by this bogus “backup.”
Instead of trusting this poorly designed placebo you will find an extensive tutorial on how to create a robust backup system that protects everything– your beautiful images and your Lightroom Catalog– at the end of this Module.
The File Handling Tab
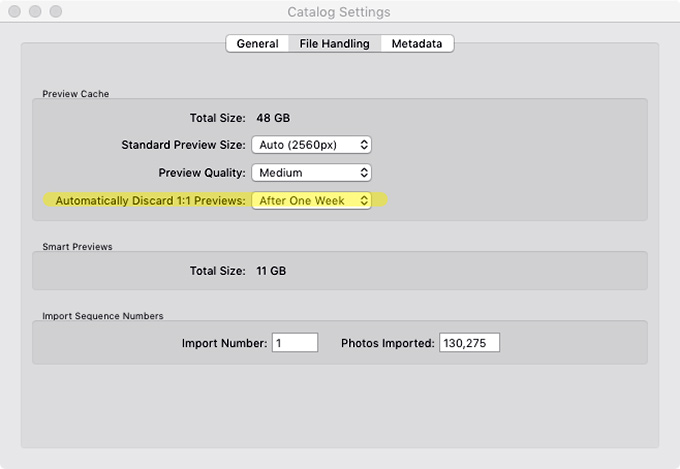
Changing the Automatically Discard 1:1 Previews preference switch away from its factory default setting here will help to reduce the size of your Lightroom Previews database. There are no right or wrong settings here but Lightroom will seize a lot more disk space if you leave the discard 1:1 Previews setting at “After One Month” or “Never.” Personally, I find the “After One Week” choice to be ideal for my needs.
The Metadata Tab
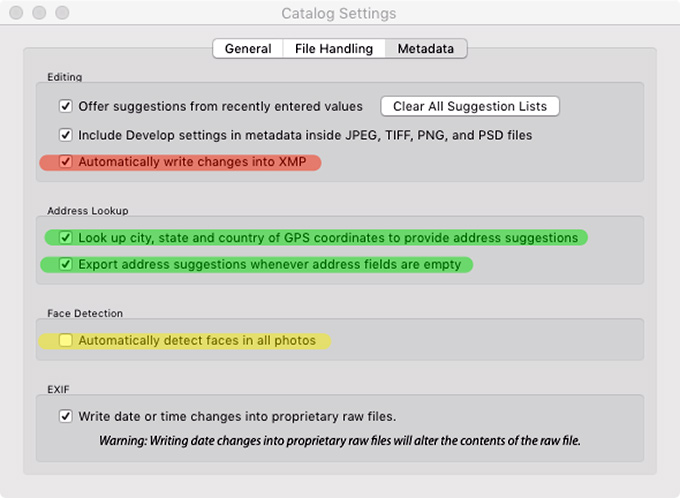
One of the most important settings in this entire program is buried deep inside of this tab. It is absolutely vital that you understand the choice that you are making here with the Automatically Write Changes to XMP switch! Failure to enable this switch, or to manually save your metadata down to the file level, can have dire consequences. This little switch is so important to your long-term success with this software that it warrants a separate tutorial in the next lesson.
There are also a couple of other options in here that relate to Lightroom’s Map Module and to Lightroom Classic’s Facial Recognition feature. If you are using either of these organizational features then these switches might interest you.
